タグ: Windows

  • Using Voice Translation Input as Japanese-to-Japanese Dictation

    Using Voice Translation Input as Japanese-to-Japanese Dictation

    Using Voice Translation Input as Japanese-to-Japanese Dictation

    The phrase "voice translation input" sounds like a tool for translating one language into another. That is one use case, but it is not the only one.

    If you set both the input language and output language to Japanese, the same workflow becomes Japanese-to-Japanese dictation. You speak in Japanese, the app turns your speech into Japanese text, and the text is inserted into the active app.

    This makes voice translation input useful even when you are not translating anything. It can become a daily writing tool for email, chat, AI prompts, meeting notes, and business messages.

    Why Same-Language Voice Input Matters

    Most people think of voice input as a accessibility feature or a mobile keyboard feature. On a desktop PC, however, voice input can be a productivity tool.

    There are many situations where speaking is faster than typing:

    • Writing a long chat reply.
    • Drafting an email.
    • Creating a prompt for an AI assistant.
    • Taking quick notes after a meeting.
    • Turning a rough idea into text.
    • Creating a first draft before editing with a keyboard.

    Typing is still better for URLs, code, tables, names, and precise formatting. But for natural language, voice input can reduce the friction of starting.

    What Japanese-to-Japanese Dictation Looks Like

    Imagine you want to write this:

    Thank you for the meeting today. I will check the pricing plan, security requirements, and implementation schedule, then follow up by the end of the week.

    If you are writing in Japanese, you might say:

    本日はお打ち合わせありがとうございました。料金プラン、セキュリティ要件、導入スケジュールを確認し、今週中にご連絡します。

    That sentence is easy to speak but slower to type. With Japanese-to-Japanese dictation, you can speak it naturally and then make small edits afterward.

    The goal is not to eliminate the keyboard. The goal is to use voice for the first draft and the keyboard for cleanup.

    Best Use Cases

    Email Drafts

    Business emails often follow predictable patterns. You can speak the core message first, then adjust honorifics, names, and details.

    For example:

    お世話になっております。先ほどの件について、追加で2点確認させてください。1点目は契約開始日、2点目は請求方法です。

    This kind of sentence is natural to speak and easy to clean up.

    Chat and Team Communication

    Slack, Chatwork, Teams, and similar tools are full of short but context-heavy messages. Voice input works well when a message is too long to type comfortably but not formal enough to require a polished document.

    Examples:

    • Explaining why a task is delayed.
    • Summarizing a customer request.
    • Asking a teammate to check a file.
    • Turning a quick thought into a readable update.

    AI Prompts

    AI prompts are often better when they include context. The problem is that typing context takes effort.

    With voice input, you can say:

    I want to write a blog article for Windows users who want faster voice input. Include a section about using PowerToys to remap an unused key to F13, and explain why F13 avoids shortcut conflicts.

    That gives the AI more useful information than a short typed command.

    Meeting Notes

    After a meeting, you may remember the key points but not want to type a full summary. Voice input lets you capture the rough version quickly:

    今日の打ち合わせでは、見積もり、導入時期、社内承認フローの3点が論点になった。次回までに料金表とセキュリティ資料を送付する。

    You can then edit it into a cleaner note.

    A Practical Workflow

    Here is a simple desktop workflow:

    1. Open the app where you want to insert text.
    2. Place the cursor in the text field.
    3. Hold your voice input hotkey.
    4. Speak one thought at a time.
    5. Release the key.
    6. Review the inserted text.
    7. Fix names, punctuation, and formatting with the keyboard.

    Short chunks work better than long monologues. Try speaking one paragraph at a time.

    Why a Dedicated Hotkey Helps

    Voice input should be fast enough that you use it without thinking. If the shortcut is awkward, the workflow breaks.

    That is why a dedicated key matters. With Microsoft PowerToys, you can remap an unused key to F13 and assign F13 as your voice input hotkey. F13 is rarely used by normal apps, so it is less likely to conflict with browser, spreadsheet, or editor shortcuts.

    For a detailed setup, see How to Create a Dedicated Voice Input Key with PowerToys and F13.

    Dictation vs Translation

    The same tool can support two workflows:

    Workflow Example
    Japanese to Japanese Speak Japanese and insert Japanese text
    Japanese to English Speak Japanese and insert English text
    English to Japanese Speak English and insert Japanese text

    This is where voice translation input is different from a simple dictation tool. You can use it as dictation most of the time, then switch to translation when needed.

    For example, you might write internal notes in Japanese, then use Japanese-to-English input for a message to an overseas colleague.

    Tips for Better Results

    Speak in Complete Phrases

    Do not speak one word at a time. Speak in short, complete phrases:

    明日の打ち合わせでは、料金プランと導入スケジュールを確認します。

    This gives the recognition system more context.

    Pause Between Ideas

    If you have multiple points, pause between them. This makes the output easier to edit.

    Edit After Dictation

    Voice input is best for drafting. Use the keyboard to fix:

    • Names
    • Numbers
    • URLs
    • Product names
    • Punctuation
    • Formatting

    Use It Where You Already Write

    The best voice input tool is the one you use inside your normal workflow. Try it in Gmail, Slack, ChatGPT, Notion, Word, or your browser instead of creating a separate dictation document.

    Cost Considerations

    Specialized AI dictation tools often use monthly subscriptions. Jitan Translate's Starter plan begins at JPY 450 per month and includes access to voice translation app workflows, including voice translation input usage allowances.

    That makes it a lower-cost way to test whether desktop voice input fits your daily work. If you mainly need Japanese dictation plus occasional translation, it is worth trying before committing to a higher-priced dedicated dictation service.

    Source: Jitan Translate pricing

    Summary

    Voice translation input is not only for translation. Used Japanese-to-Japanese, it becomes a practical desktop dictation tool.

    Use it for email, chat, AI prompts, notes, and rough drafts. Use the keyboard for precise cleanup. If you create a dedicated F13 hotkey with PowerToys, voice input becomes easier to use throughout the day.

    For users who write in Japanese and sometimes need translation, this combination is more flexible than a basic dictation tool.
  • How to Create a Dedicated Voice Input Key with PowerToys and F13

    How to Create a Dedicated Voice Input Key with PowerToys and F13

    How to Create a Dedicated Voice Input Key with PowerToys and F13

    Voice input becomes much more useful when it has a dedicated key. If you need to press a complicated shortcut every time you want to dictate, you will probably stop using it. If the shortcut conflicts with your browser, editor, spreadsheet, chat app, or meeting software, it becomes even worse.

    A practical solution on Windows is to create a key that behaves like F13 and use it as your dedicated voice input key.

    F13 is not printed on most keyboards, but Windows can still recognize it as a key. Microsoft PowerToys includes a tool called Keyboard Manager that can remap one key to another, including extended function keys such as F13. That means you can take a key you rarely use and turn it into a clean, low-conflict hotkey for voice input.

    For Japanese keyboard users, a strong candidate is the Katakana / Hiragana / Romaji key. Many people rarely use it directly, and it sits in a convenient location for push-to-talk style input. By remapping that key to F13, you can create a dedicated voice input button without buying a special keyboard.

    Why F13 Is a Good Voice Input Hotkey

    Most common shortcuts use letters, numbers, function keys from F1 to F12, or modifier combinations such as Control + Shift. F13 is different. It exists as a recognized key code, but most mainstream apps do not assign default actions to it.

    That makes F13 useful for voice input:

    • It is unlikely to conflict with browser shortcuts.
    • It is unlikely to conflict with Office app shortcuts.
    • It can be used as a single-key trigger.
    • It can be mapped to a physical key you already have.
    • It keeps your voice input workflow separate from normal typing shortcuts.

    This is especially helpful for apps that use push-to-talk or press-and-hold recording. You want the key to feel like part of the keyboard, not like a complicated command.

    What You Need

    You need three things:

    1. A Windows PC.
    2. Microsoft PowerToys.
    3. A voice input or voice translation app that can accept F13 as a hotkey.

    PowerToys is a Microsoft utility suite for Windows. Keyboard Manager is one of its tools. It lets you remap keys and shortcuts at the system level. Microsoft documents Keyboard Manager as a way to redefine keys and shortcuts, including function keys beyond the standard F1-F12 range.

    Source: Microsoft PowerToys Keyboard Manager

    Step 1: Install and Open PowerToys

    Install Microsoft PowerToys from Microsoft Store or GitHub. After installation, open PowerToys and select Keyboard Manager from the left-side menu.

    Make sure Keyboard Manager is enabled. If it is disabled, remapping will not apply.

    Step 2: Remap an Unused Key to F13

    In Keyboard Manager, choose Remap a key. Then create a mapping like this:

    Setting Value
    Physical key A key you rarely use
    Mapped to F13

    On a Japanese keyboard, the physical key can be the Katakana / Hiragana / Romaji key if you do not use it for IME control. On some systems, the exact label shown by PowerToys may vary. The important point is to press the physical key you want to use, then map it to F13.

    After saving the remap, pressing that physical key should send F13 to Windows.

    Step 3: Assign F13 in Your Voice Input App

    Open your voice input app and go to the hotkey settings. Choose a custom hotkey and press the remapped key.

    If PowerToys is working, the app should see it as F13. Save the setting and test it in a text field.

    A good test workflow is:

    1. Open Notepad, a browser input box, or a chat app.
    2. Place the cursor in the text field.
    3. Hold the remapped key.
    4. Speak a short sentence.
    5. Release the key and check the inserted text.

    Start with short sentences before using it for long dictation.

    Good Keys to Remap

    The best key depends on your keyboard and habits.

    Candidate key Good for Caution
    Katakana / Hiragana / Romaji Japanese keyboard users who rarely use IME-specific keys Avoid if you rely on it for Japanese input switching
    Muhenkan Users who do not use conversion controls May matter for Japanese IME workflows
    Henkan Users who rarely use the conversion key Can interfere with Japanese text workflows
    Caps Lock Users who never use Caps Lock Some people need it for English typing
    Right Alt Users who prefer a built-in single key Can conflict with Alt-based behavior in some environments

    For many Japanese keyboard users, the Katakana key is the cleanest candidate. It is visible, easy to reach, and often underused.

    Why This Works Well for Voice Translation

    Voice translation input is not only a translation feature. It is also a fast way to create text.

    With a dedicated F13 key, you can:

    • Dictate Japanese text into email and chat.
    • Speak Japanese and insert English output.
    • Draft prompts for ChatGPT or Claude.
    • Create meeting notes.
    • Reply to messages faster.
    • Translate short business messages without opening a separate web translator.

    The dedicated key changes the workflow. Instead of thinking "I need to open a translation app," you simply press a key, speak, and insert text.

    Common Problems and Fixes

    The App Does Not Detect F13

    Check whether PowerToys is running. Keyboard Manager remaps only work while PowerToys is active. Also make sure the remap is enabled and saved.

    The Wrong Key Is Being Remapped

    Open Keyboard Manager again and use the key detection option instead of choosing from a list manually. Keyboard labels can vary by hardware and layout.

    The Key Still Does Something Else

    Another app may be capturing the physical key before the remap, or the key may be tied to IME behavior. Try another unused key such as Muhenkan, Henkan, or Caps Lock.

    F13 Conflicts with a Specific App

    F13 conflicts are uncommon but possible in specialized software. If that happens, try F14 or F15 instead.

    When Not to Use This Setup

    Do not remap a key you actually use. If you rely on the Katakana key or conversion keys for Japanese typing, changing them may slow you down. The goal is to create a frictionless voice input key, not to break your normal keyboard workflow.

    Also, if you use a company-managed PC, check whether PowerToys or keyboard remapping is allowed by your IT policy.

    Summary

    PowerToys lets you turn an unused key into F13, and F13 is a strong choice for a dedicated voice input hotkey because it rarely collides with everyday shortcuts.

    For Japanese keyboard users, remapping the Katakana / Hiragana / Romaji key to F13 can create a practical push-to-talk key for voice input and voice translation. Once set up, you can use voice input across email, chat, AI prompts, and translation workflows without reaching for complicated shortcut combinations.

    Jitan Translate supports voice translation input workflows and starts from JPY 450 per month on the Starter plan. If you want a low-friction Windows voice input setup, combining PowerToys with an F13 hotkey is a practical place to start.

  • PowerToysでF13キーを作り、音声翻訳入力の専用キーにする方法

    PowerToysでF13キーを作り、音声翻訳入力の専用キーにする方法

    PowerToysでF13キーを作り、音声翻訳入力の専用キーにする方法

    音声入力アプリを毎日使うなら、起動キーはかなり重要です。Ctrl + Alt + 何か、Right AltSpace などでも使えますが、普段のショートカットと重なると、ブラウザ、Excel、チャットツール、開発環境で思わぬ動作を起こすことがあります。

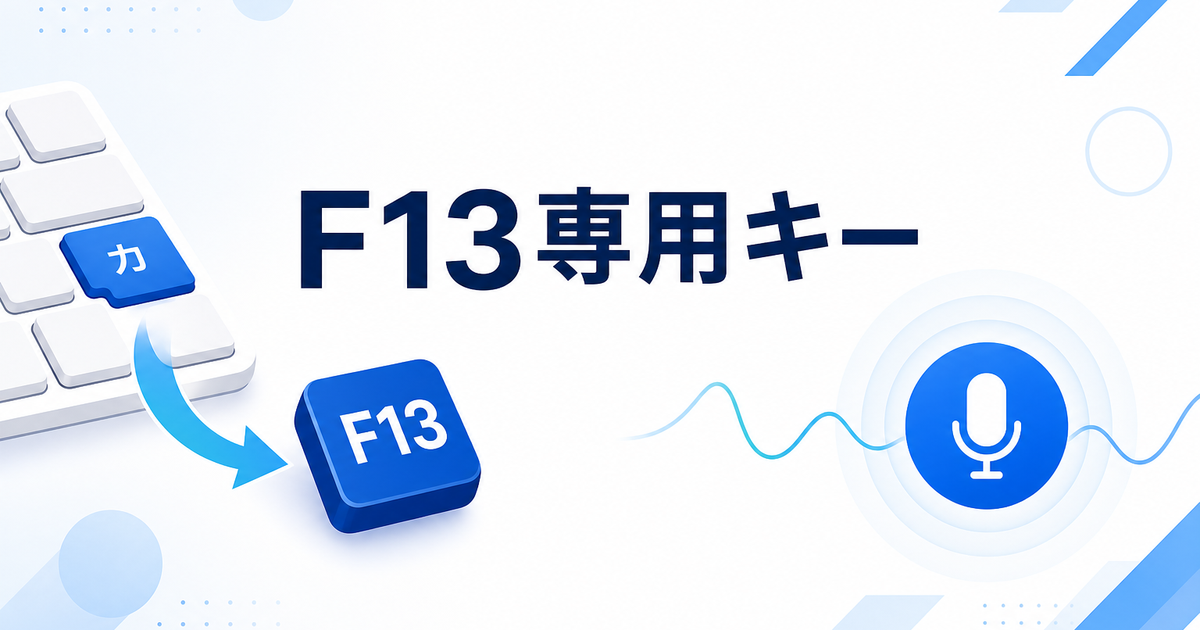
    そこでおすすめなのが、PowerToysで普段使わないキーをF13にリマップし、F13を音声翻訳入力の専用キーにする方法です。

    F13は一般的なキーボードには物理キーとして存在しませんが、Windows上ではキーとして扱えます。Microsoft PowerToysのKeyboard Managerでは、F13〜F24のような拡張ファンクションキーも割り当て対象にできます。多くのアプリではF13を標準ショートカットに使っていないため、音声入力専用キーとして使いやすいのが利点です。

    なぜF13を使うのか

    音声翻訳入力は、思いついた瞬間に押して話す使い方が向いています。キー操作に迷うと、声に出す前に考えが途切れてしまいます。

    専用キーとしてF13を使うメリットは次の通りです。

    • 既存アプリのショートカットと衝突しにくい
    • 単独キーとして押せるため、音声入力を始めやすい
    • 物理的には別のキーを使えるため、押しやすい場所を選べる
    • PowerToysを使えば、特殊なキーボードを買わなくても設定できる

    特に日本語キーボードでは、カタカナ/ひらがな/ローマ字キーをほとんど使っていない人が多いはずです。このキーをF13に割り当てると、キーボード右下付近に「音声入力専用ボタン」を作れます。

    全体の流れ

    設定は大きく2段階です。

    1. PowerToysで、カタカナキーなど普段使わないキーをF13にリマップする
    2. じたん翻訳アプリの音声翻訳入力で、ホットキーにF13を設定する

    これで、カタカナキーを押している間だけ音声入力し、離したら文字が入力されるような運用ができます。

    Step 1: PowerToysをインストールする

    PowerToysはMicrosoftが提供しているWindows向けユーティリティです。キーボードのキー割り当てを変える「Keyboard Manager」が含まれています。

    インストール後、PowerToysを起動し、左側メニューから Keyboard Manager を開きます。

    Step 2: Keyboard Managerでキーをリマップする

    Keyboard Managerを開いたら、次のように設定します。

    項目 設定内容
    Remap a key 開く
    Physical Key カタカナ/ひらがな/ローマ字キー
    Mapped To F13

    PowerToysの画面では、キー名が環境によって異なる場合があります。たとえば「Kana」「Katakana」「IME related key」のように表示されることがあります。重要なのは、実際に押したいキーをPowerToysに認識させ、それをF13へ変換することです。

    設定を保存したら、以後そのキーはWindows上でF13として扱われます。

    Step 3: 音声翻訳入力のホットキーをF13にする

    次に、じたん翻訳アプリを開きます。

    音声翻訳入力の設定でホットキーを変更し、PowerToysで作ったF13キーを押して登録します。登録後は、カタカナキーを押すとアプリ側にはF13が入力されたように見えます。

    うまく登録できない場合は、次の点を確認してください。

    • PowerToysが起動しているか
    • Keyboard Managerが有効になっているか
    • じたん翻訳アプリを再起動しても同じキーが認識されるか
    • 他のアプリでF13が別機能に割り当てられていないか

    おすすめのキー候補

    F13の元にする物理キーは、普段使っていないキーを選びます。

    候補キー 向いている人 注意点
    カタカナ/ひらがな/ローマ字 日本語キーボードで使っていない人 IME操作に使っている人は避ける
    無変換 変換操作を使わない人 日本語入力で使う人には不向き
    変換 変換キーを使わない人 誤操作すると文章入力に影響する
    Caps Lock 英語入力中心の人 大文字固定を使う人には不向き
    右Alt 標準設定に近い運用をしたい人 一部アプリでAlt系ショートカットと重なる場合がある

    最もおすすめしやすいのは、カタカナキーをF13にする方法です。日本語入力中でも使っていない人が多く、押す位置も比較的わかりやすいためです。

    F13専用キーにすると何が変わるか

    専用キーを作ると、音声入力の使い方が「アプリを起動してから使うもの」ではなく、「キーボードの一部」として定着します。

    たとえば、次のような使い方ができます。

    • ChatGPTやClaudeへのプロンプトを声で入力する
    • SlackやChatworkの返信を声で下書きする
    • Gmailの返信文を声で作る
    • NotionやWordにメモを残す
    • 日本語で話して日本語の文章として入力する
    • 日本語で話して英語に翻訳して入力する

    音声翻訳入力という名前ですが、翻訳だけに使う必要はありません。日本語から日本語への音声入力としても使えるため、長文入力やアイデア出しにも向いています。

    うまく使うコツ

    F13専用キーを作ったら、最初は短い文章から試すのがおすすめです。

    たとえば、いきなり長文メールを書くのではなく、次のような短い入力で慣れます。

    • 「承知しました。確認して本日中に返信します。」
    • 「この内容をもう少し丁寧な表現にしてください。」
    • 「明日の打ち合わせでは、料金プランと導入スケジュールを確認します。」

    短い入力で安定して使えるようになると、音声入力への抵抗がかなり下がります。

    まとめ

    PowerToysでカタカナキーをF13にリマップすると、音声翻訳入力の専用キーを作れます。F13は多くのアプリで使われていないため、ショートカット干渉を避けたい人に向いています。

    じたん翻訳の音声翻訳入力は、翻訳だけでなく日本語音声入力にも使えます。スタータープランは月額450円から利用できるため、まずはF13専用キーを作り、日常の文章入力で試してみるのがおすすめです。

    PC音声翻訳の仕組みもあわせて確認する